

How can you Add Text in Capcut quickly?
January 14, 2025
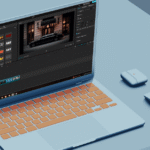
Tutorial: How to blur video background in Capcut?
January 16, 2025
Let’s talk about some different scenarios.
Scenario 1: You were shooting a vlog and captured some awesome shots while travelling. But there were a few shots where some strangers requested to hide their faces when you uploaded the video publicly.
Scenario 2: You are shooting a podcast on a very sensitive topic, and the guest would not like to reveal their identity. Now, the best option is to blur their face.
Scenario 3: You are giving a walkthrough and review of your new car, and you want to hide the licence plate to maintain privacy.
There can be many such scenarios where you need to blur a specific part in your video, and for that, Capcut comes to your rescue. In this detailed tutorial, I will explain the process in detail. Alternatively, read this post if you are looking for blurring out a video completely.
Step-by-step process to blur a specific part in Capcut
Step 1: Create a Project
Open a new project, add your clips in the media section, and place the video on one of the tracks to start editing.
Step 2: Duplicating the Clip
Once you have the video in your timeline, could you select it and duplicate it? It will make another track and a new video copy will be automatically added to it.
Step 3: Add Blur Effect
Open the effects menu in your caput software. Search for an effect called “Blur “or some of its variations, such as Basic, Gaussian, etc. Select the effect and drag it over your duplicated clip. Make sure your duplicated track is above the original layer.
Step 4: Do Masking
Again, go to the effects menu or overlay menu and find the “Mask “option. Please select it and drag it over the blurred video. Choose a masking shape like a circle, rectangle or any other. I always prefer a rectangle shape due to its ease of use and reframing. Adjust the mask over the area that needs to be blurred.
If you see that the masked area is only visible and the rest of the area is blurred, then click on “Invert” to reverse the masking. You can also change the size of the mask and add a feather touch to make it smoother.
Step 5: Do Motion Tracking
If your masked area has something moving, then you need to move the mask accordingly. Since Capcut doesn’t have that automatic motion tracking option, you have to add keyframes to animate the process and adjust the mask frame by frame.
Step 6: Export the Video
Once you have completed the animation process or the masking is done properly as per your needs, then select the complete data, i.e. video, audio and other elements and click on the “Export” option to save the video in your smartphone in the desired format and resolution.
I hope the process was easy to understand, and I want you to go now and try it on your desired video.
